1. Understand the paint:
Textile Paints can be applied with brushes, sponges, stamps and squirt bottles.
Luminere are metallic paints that brush on like butter. The paint remains flexible. They are opaque, even on dark fabrics.
Paint Sticks are oil paint in a crayon like form, very suitable for stenciling on fabric.
Dye-Na-Flow & Seta color are free flowing textile paints, not suitable for stenciling
2. Easy Clean up: Tape plastic to your table.
3. Discourage leaks: Use some hairspray on the underneath side of your stencil to make it stick on the surface, and to help prevent the paint seeping in at the edge.
4. Securing basics: keep a stencil in place by taping it at the top and bottom with a piece of tape and iron the fabric to freezer paper.
5. Less is more: Load the brush lightly, so that the ends of the bristles are covered evenly; wipe off any excess on a piece of paper or cloth. You'll get better results by applying two thin coats rather than one thick one. Wait for the first to dry before applying the second.
6. Work from the outside: Start painting on the edges of the stencil, working into the center. This helps prevent paint getting under the edges.
7. Appling the paint: Stencil brushes are round with short, stiff bristles. Use quick up-and-down movement to dab paint onto your fabric. This helps prevent paint getting under the edges.
8. Go multi-colored: To use more than one color in a stencil, use tape to mask off areas of the stencil you don't want in a particular color.
9. Wash regularly: If you're doing a repeat design, wash your stencil regularly in warm water to keep the edges free of paint. If there's some paint on an edge, you won't get a crisp edge to your painted stencil.
10. Store stencils flat: A stencil needs to be flat to be usable. Store it in a large flat box.
skip to main |
skip to sidebar


STITCHING THROUGH THE LAYERS; The Art and Elegance of Straight Line Stitching

QUILT TOPPINGS; Fun and Fanciful Embellishment Techniques

EYE CANDY QUILTS; Super-fast fun with beads, baubles, buttons and more.

A FINE LINE; Techniques and Inspirations for Creating the Quilting Design

 Posts
Posts
Posts
Posts

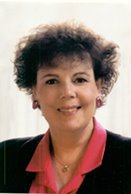
My quilts are colorful, graphic, vibrant, and joyful!
- Melody Crust
- My quilts are colorful, graphic, vibrant and joyful!! I use color and texture to explore the glories of nature. Realism or abstraction, are used as best fits a theme or concept. I enjoy the challenge and excitement of translating my vision into quilts through a rich variety of fabrics, gilding and embellishment. I find such joy in being able to express myself through quilting, that I'm not comfortable without a needle in my hand. Quilting is my life's work and a wonderful one at that. The best quilt is always the next one.
BERNINA Ambassador
Currently available books:
STITCHING THROUGH THE LAYERS; The Art and Elegance of Straight Line Stitching
QUILT TOPPINGS; Fun and Fanciful Embellishment Techniques
EYE CANDY QUILTS; Super-fast fun with beads, baubles, buttons and more.
A FINE LINE; Techniques and Inspirations for Creating the Quilting Design
link to web site
Subscribe To Melody Crust


Blog Archive
My favorite quilting blogs!
BERNINA
2 comments:
I've never heard the hairspray tip. I'll be sure to try that next time I stencil. Thanks!
Lynn,
Works great!
Melody
Post a Comment