I love to quilt, I especially love dense stitching. I have some tips and
tricks to make your machine stitches, quilts the best ever.
Batting - I prefer cotton batting because among other things:
Cotton tends to stick to the quilt top and the
backing, allowing for easier machine stitching. Thin cotton batting rolls up
compactly (a nice quality for machine quilting).
Safety pins – The 1” size work the best. And if you have bent
quilter’s pins work even better. Use lots, I place the pins about 4” apart. I
remove them as needed.
A walking foot - It has built-in feed dogs that help move the top layers of
fabric through your machine, while your machine's own feed dogs move the bottom
layers through. This helps ensure the layers don't shift while you are quilting.
Basting - First, lay the quilt BACK on a flat surface, right side down. Use masking
tape around the perimeter to hold the edges in place. The fabric should be
taught but not distorted. Next, place the batting on top of the quilt back. Smooth
out any wrinkles or air bubbles with your hand. Finally, lay the quilt top on
the batting, right side up. Once again, use your hand to smooth out any
wrinkles or air bubbles in the fabric.

NOTE: Take the time to make sure all the straight lines that should be
straight are straight.
On a sample, test the tension and stitch length.
Change the needle.
If I can hide the starts and stops in under the binding, I back stitch at the
beginning and end of each line of quilting to lock the stitches.
When I start quilting, I use the edge of the fabric as a guide, keeping my
walking foot placed along it as I stitch.
Use the needle down, if possible, so the fabric doesn't shift.
I use the previous line of quilting as my guide for the next line, keeping
the edge of my walking foot against it while I work on the next line of
quilting.
Before you know it, your beautiful quilt will be beautifully quilted!


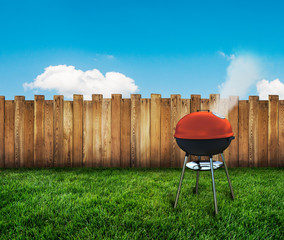 Memorial Day is a day often reserved for enjoying the beginnings of
summer. We barbecue, spend time outdoors, hang out with friends and
catch up with family, but the real reason for the holiday is much more
important. Memorial Day is the day dedicated to honoring all of those
who have sacrificed their lives in service of this great nation.
Memorial Day is a day often reserved for enjoying the beginnings of
summer. We barbecue, spend time outdoors, hang out with friends and
catch up with family, but the real reason for the holiday is much more
important. Memorial Day is the day dedicated to honoring all of those
who have sacrificed their lives in service of this great nation.
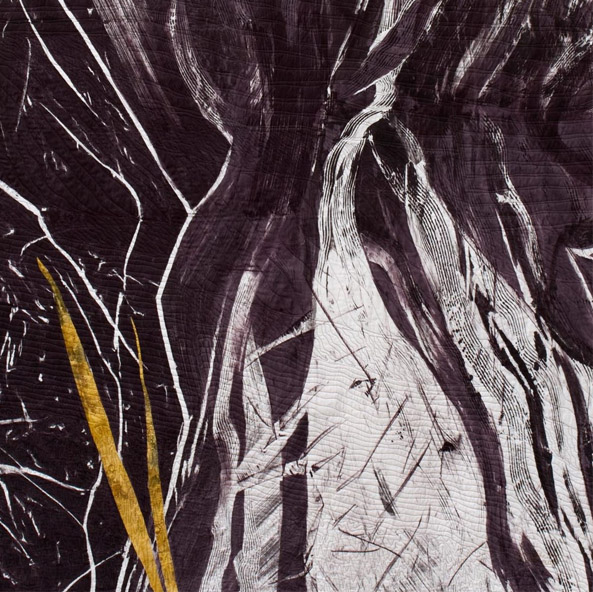 The Contact features over 30 of Ann Johnston’s large-scale quilts inspired by the California Sierra Nevada range. Johnston’s quilts—made from cloth that the artist has dyed herself—make creative use of patterns and textures to create literal, abstract, and sometimes completely imaginative representations of the area. These works demonstrate the mastery with which Johnston uses different processes in her fabrics to produce fascinating pieces that draw viewers in, powerful on their own and cohesive as a series.
 The City of Los Angeles often known by its initials L.A., is the cultural, financial, and commercial center of Southern California. With a census population of 3,971,883, it is the second-most populous city in the United States (after New York City). Located in a large coastal basin surrounded on three sides by mountains reaching up to and over 10,000 feet, Los Angeles covers an area of about 469 square miles.

 Friday morning I took an early flight to LAX. Wanted to spend some time in the California sunshine. Saturday morning got up early to go to the Fashion District in LA. The LA Fashion District is home to the largest selection of textiles and notions in the United States. There are nearly 200 wholesale and retail textile stores selling trim,
beading and fabric, crafts and home decor. Shoppers can find nearly
every type of fabric, running the gamut from novelty to exotic silks and
European upholstery. Prices range from 99 cents up to hundreds of
dollars per yard. Designers, stylists and crafters all rely on the textiles and resources of the LA Fashion District. Textile and notion stores are generally centered within four blocks,
from 8th Street down to Olympic Boulevard, between Maple Avenue and San
Julian Street.
Friday morning I took an early flight to LAX. Wanted to spend some time in the California sunshine. Saturday morning got up early to go to the Fashion District in LA. The LA Fashion District is home to the largest selection of textiles and notions in the United States. There are nearly 200 wholesale and retail textile stores selling trim,
beading and fabric, crafts and home decor. Shoppers can find nearly
every type of fabric, running the gamut from novelty to exotic silks and
European upholstery. Prices range from 99 cents up to hundreds of
dollars per yard. Designers, stylists and crafters all rely on the textiles and resources of the LA Fashion District. Textile and notion stores are generally centered within four blocks,
from 8th Street down to Olympic Boulevard, between Maple Avenue and San
Julian Street. Spent most of the day visiting The Santee Alley. Over 150 stores selling apparel, footwear, accessories, beauty
supplies, cosmetics, and more. The Santee Alley makes up two blocks of
the 100-block LA Fashion District. It has traditionally been the retail
core of the area, popular for bargain shopping and its bazaar-like
atmosphere. Open 7 days a week, rain or shine.
Spent most of the day visiting The Santee Alley. Over 150 stores selling apparel, footwear, accessories, beauty
supplies, cosmetics, and more. The Santee Alley makes up two blocks of
the 100-block LA Fashion District. It has traditionally been the retail
core of the area, popular for bargain shopping and its bazaar-like
atmosphere. Open 7 days a week, rain or shine.


 Inspiration comes from many places. Sometimes I just need to figure out what to do with it!
 I love to quilt, I especially love dense stitching. I have some tips and
tricks to make your machine stitches, quilts the best ever.
I love to quilt, I especially love dense stitching. I have some tips and
tricks to make your machine stitches, quilts the best ever. NOTE: Take the time to make sure all the straight lines that should be
straight are straight.
NOTE: Take the time to make sure all the straight lines that should be
straight are straight.  May Day has been a traditional day of festivities throughout the
centuries. May Day is most associated with towns and villages
celebrating springtime fertility and revelry with village fetes
and community gatherings. Perhaps the most
significant of the traditions is the maypole, around which traditional dancers circle with ribbons.
May Day has been a traditional day of festivities throughout the
centuries. May Day is most associated with towns and villages
celebrating springtime fertility and revelry with village fetes
and community gatherings. Perhaps the most
significant of the traditions is the maypole, around which traditional dancers circle with ribbons.